There’s something magical about watching pumpkins grow from tiny seeds into massive, vibrant fruits. Whether you're a seasoned gardener or a beginner with a green thumb, understanding the day pumpkin growing stages is essential for a successful harvest. Pumpkins are more than just Halloween decorations; they are versatile fruits that can be used in cooking, crafting, and more. By mastering the growth stages of pumpkins, you can ensure healthy plants and bountiful yields.
From seed germination to the final harvest, pumpkins go through several distinct stages of development. Each stage requires specific care and attention to ensure optimal growth. In this article, we’ll break down the day pumpkin growing stages, providing you with actionable tips to nurture your pumpkin plants from start to finish.
This guide is designed to help you understand the nuances of pumpkin cultivation, including soil preparation, watering schedules, pest control, and harvesting techniques. Let’s dive in and explore the fascinating journey of growing pumpkins!
Read also:Understanding The Fact Family Of Numbers A Comprehensive Guide
Table of Contents
- Understanding Pumpkin Biology
- Stage 1: Seed Germination
- Stage 2: Seedling Development
- Stage 3: Vegetative Growth
- Stage 4: Flowering
- Stage 5: Fruit Set
- Stage 6: Fruit Development
- Stage 7: Ripening
- Stage 8: Harvesting
- Tips for Successful Pumpkin Growing
- Conclusion
Understanding Pumpkin Biology
Pumpkins belong to the Cucurbitaceae family, which also includes cucumbers, melons, and squash. Understanding their biological makeup is crucial for successful cultivation. Pumpkins are warm-season crops that thrive in full sunlight and well-drained soil. They require a long growing season, typically between 75 to 120 days, depending on the variety.
Pumpkin Varieties
Pumpkins come in various shapes, sizes, and colors. Some popular varieties include:
- Jack-O-Lantern: Ideal for carving
- Small Sugar Pumpkin: Perfect for baking
- Giant Pumpkins: Grown for competitions
- White Pumpkins: Unique and decorative
Each variety has its own growth requirements, so it’s important to choose the right one based on your gardening goals.
Stage 1: Seed Germination
The first stage of pumpkin growth begins with seed germination. This process typically takes 5 to 10 days, depending on soil temperature and moisture levels. Seeds should be planted in well-prepared soil with a temperature of at least 70°F (21°C).
Read also:Selma Auto Mall The Ultimate Guide To Buying Your Dream Car In Selma California
Preparation for Germination
To ensure successful germination:
- Soak seeds overnight to soften the outer shell.
- Plant seeds 1 inch deep in the soil.
- Space seeds 2 to 4 feet apart to allow room for growth.
Once planted, keep the soil consistently moist but not waterlogged. Proper germination sets the foundation for healthy pumpkin plants.
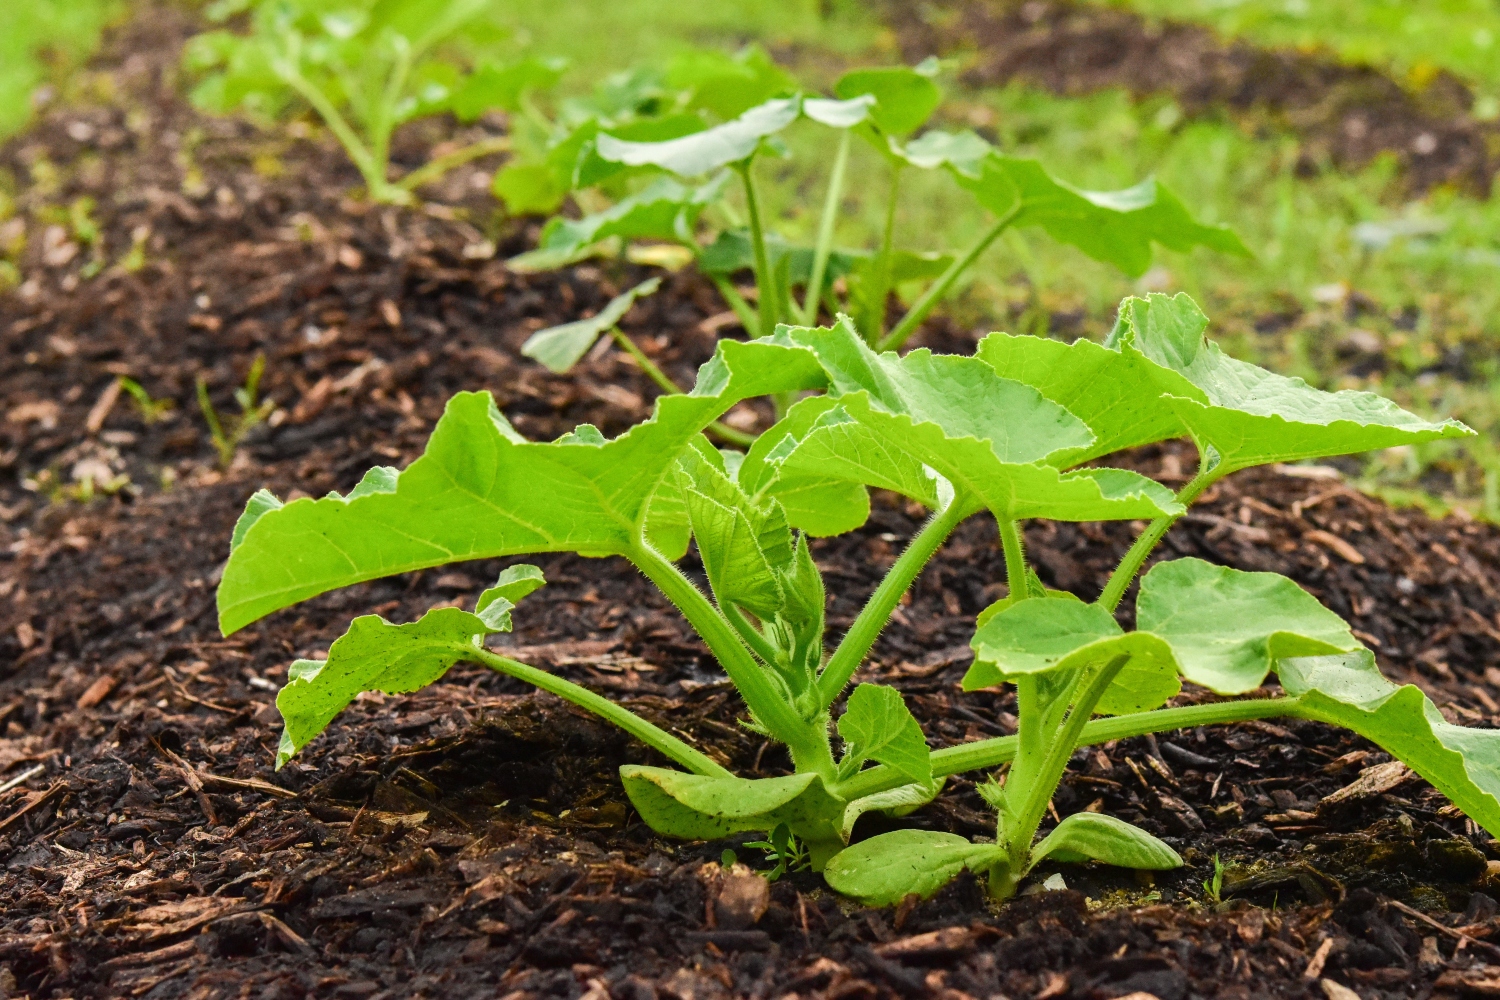
Stage 2: Seedling Development
After germination, pumpkin seedlings emerge from the soil. This stage lasts approximately 2 to 3 weeks. During this time, the seedlings develop their first true leaves, which are crucial for photosynthesis.
Caring for Seedlings
To support seedling development:
- Provide adequate sunlight (at least 6 hours per day).
- Mulch around the base of the plants to retain moisture.
- Weed regularly to prevent competition for nutrients.
Healthy seedlings are the key to strong plants in later stages of growth.
Stage 3: Vegetative Growth
As the seedlings mature, they enter the vegetative growth stage. This is when the plants develop vines, leaves, and roots. Vegetative growth typically occurs between 3 to 6 weeks after planting.
Optimizing Vegetative Growth
During this stage:
- Water deeply once a week to encourage deep root growth.
- Fertilize with a balanced fertilizer to promote leaf development.
- Prune excess vines to focus energy on fruit production.
Strong vegetative growth ensures that the plants have the energy needed for flowering and fruiting.
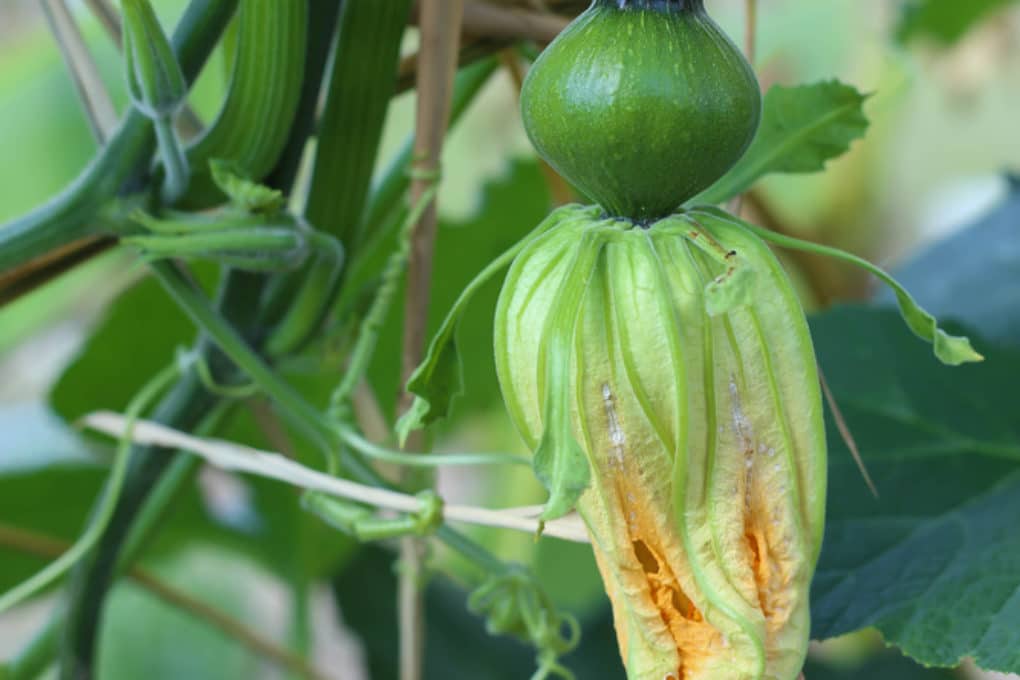
Stage 4: Flowering
Flowering is a critical stage in pumpkin growth. Pumpkins produce both male and female flowers, which must be pollinated for fruit set to occur. This stage typically begins around 6 to 8 weeks after planting.
Pollination Process
To enhance pollination:
- Encourage bees and other pollinators by planting flowering plants nearby.
- Hand-pollinate flowers if necessary by transferring pollen from male to female flowers.
- Avoid using pesticides that harm beneficial insects.
Successful pollination leads to the development of pumpkin fruits.
Stage 5: Fruit Set
Once pollination occurs, the female flowers develop into small pumpkins. This stage marks the beginning of fruit set, which typically happens 8 to 10 weeks after planting. Proper care during this stage ensures that the fruits grow evenly and remain healthy.
Supporting Fruit Set
To support fruit set:
- Water consistently to prevent stress on the plants.
- Fertilize with a potassium-rich fertilizer to encourage fruit development.
- Remove excess fruits to focus energy on the largest pumpkins.
Healthy fruit set lays the groundwork for successful pumpkin growth.
Stage 6: Fruit Development
As the pumpkins continue to grow, they enter the fruit development stage. This stage lasts from 10 to 12 weeks after planting. During this time, the fruits increase in size and color.
Monitoring Fruit Development
To monitor fruit development:
- Check for even coloring and firm skin on the pumpkins.
- Rotate the fruits gently to prevent flat spots.
- Protect the fruits from pests and diseases.
Proper care during this stage ensures that the pumpkins reach their full potential.
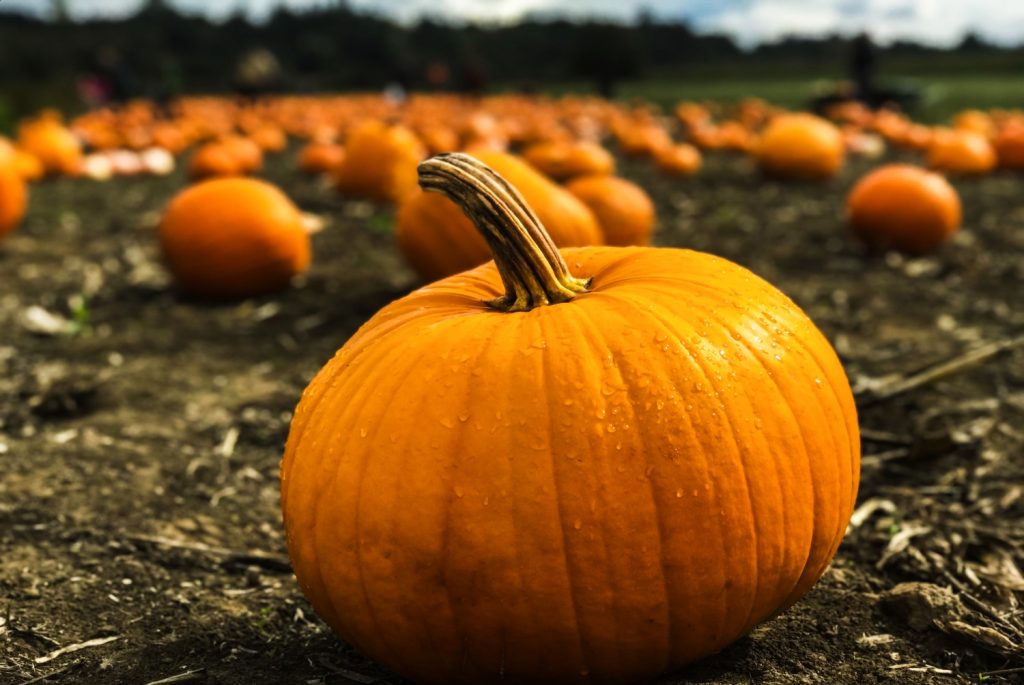
Stage 7: Ripening
Ripening is the final stage of pumpkin growth before harvest. This stage typically occurs 12 to 14 weeks after planting. During ripening, the pumpkins develop their characteristic orange color and harden their skin.
Signs of Ripeness
To determine if pumpkins are ripe:
- Tap the fruit to listen for a hollow sound.
- Check for a deep, uniform color.
- Test the skin with your fingernail; it should be hard and resist puncture.
Ripe pumpkins are ready for harvesting and storage.
Stage 8: Harvesting
Harvesting is the culmination of the pumpkin growing journey. This stage typically occurs 14 to 16 weeks after planting. Proper harvesting techniques ensure that the pumpkins remain fresh and usable for months.
Harvesting Tips
To harvest pumpkins:
- Cut the stem with a sharp knife, leaving at least 3 inches attached to the fruit.
- Avoid damaging the skin, as this can lead to rot.
- Cure the pumpkins in a warm, dry place for 10 days before storing.
Proper harvesting and storage extend the life of your pumpkins.
Tips for Successful Pumpkin Growing
Growing pumpkins can be a rewarding experience, but it requires dedication and attention to detail. Here are some additional tips to ensure success:
- Start with high-quality seeds from reputable suppliers.
- Test your soil before planting to ensure proper pH levels.
- Rotate crops annually to prevent soil-borne diseases.
- Monitor for pests and diseases regularly.
By following these tips, you can maximize your chances of growing healthy, vibrant pumpkins.
Conclusion
Growing pumpkins is a fascinating process that involves several distinct stages, from seed germination to fruit ripening. By understanding the day pumpkin growing stages and providing proper care at each stage, you can ensure a successful harvest. Remember to focus on soil preparation, watering, pollination, and pest control to nurture your plants effectively.
We encourage you to share your pumpkin-growing experiences in the comments below. Did you find this guide helpful? Consider exploring our other gardening articles for more tips and tricks. Happy planting, and may your pumpkins grow big and beautiful!